The art of drawing the back of a hoodie requires attention to detail and a steady hand. Many artists find it challenging to capture the intricate folds and contours that give a hoodie its unique shape. However, with the right techniques and practice, you can master the skill of drawing the back of a hoodie with ease. So, let's delve into the world of hoodie drawing and uncover the secrets behind creating a realistic and visually striking representation.
To achieve a lifelike depiction of the back of a hoodie, it's essential to understand the history and evolution of this iconic garment. Hoodies originated in the early 20th century and were initially worn by athletes and workers in cold environments. Over time, hoodies have become a symbol of comfort and casual style, embraced by people of all ages and backgrounds. As the demand for hoodies increased, so did the need for artists to capture their essence. By exploring various drawing techniques and studying the way fabric drapes and folds, you can bring the back of a hoodie to life on your canvas. Whether you're drawing a plain hoodie or one with intricate patterns or logos, mastering the art of hoodie drawing will allow you to express your creativity and showcase your skills to the world.
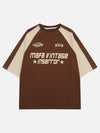
To draw the back of a hoodie professionally, follow these steps:
- Start by drawing the basic shape of the hoodie's back outline.
- Add details like the drawstrings, hood opening, and seams.
- Sketch the sleeves, making sure they align with the armholes.
- Add any design elements or logos on the back of the hoodie.
- Refine your drawing by adding shading and texture for a realistic look.

Understanding the Anatomy of the Back of a Hoodie
Before diving into the process of drawing the back of a hoodie, it's essential to have a clear understanding of its anatomy. The back of a hoodie consists of several components that give it shape, texture, and functionality.
The main feature of the back is the hood, which is attached to the neckline. The hood can be adjusted using drawstrings or elastic bands to fit the wearer's head comfortably. It typically has a curved shape to accommodate the natural contours of the head.
Below the hood, you'll find the back panel of the hoodie, which is often larger than the front panel. This extra fabric allows for more room and ease of movement. The back panel can have various styles, such as a seamless design, a center seam, or additional panels for added design elements.
In addition to the back panel, there may be other details like yokes, ribbed cuffs, and hemlines that contribute to the overall design of the hoodie. Understanding these components will help you accurately depict the back of a hoodie when drawing.
Step 1: Sketch the Basic Outline
When starting to draw the back of a hoodie, begin by sketching the basic outline. Use light pencil strokes to create a rectangular shape for the main body of the hoodie and add a curved line at the top for the hood.
Keep in mind that the back panel is usually larger than the front panel, so make the rectangle slightly wider and longer compared to the front outline. This will give the hoodie a more realistic and comfortable appearance.
Once you're satisfied with the basic outline, darken the lines to make them more prominent. It's important to have a well-defined structure before moving on to adding details.
Step 2: Add the Hood and Neckline
Next, focus on adding the hood and neckline to the drawing. Start by refining the shape of the hood, making sure it has a rounded and curved appearance. Pay attention to the position of the hood in relation to the back outline.
Once you're satisfied with the shape of the hood, draw the neckline by extending the lines from the hood down to the sides of the hoodie. The neckline should be lower at the front compared to the back, creating a slight slope.
For added realism, you can also add drawstrings or elastic bands at the neck opening. Drawstrings are typically represented by two curved lines that meet at the center front, while elastic bands can be depicted as subtle lines.
Step 3: Define the Back Panel
Now it's time to define the back panel of the hoodie. Start by adding a center seam if your hoodie design includes one. The center seam runs vertically down the middle of the back panel, adding structure and aesthetics to the garment.
If your hoodie design doesn't have a center seam, you can skip this step and proceed to the next one. However, keep in mind that a center seam can add visual interest and make the drawing more engaging.
Next, refine the shape of the back panel by smoothing out any irregularities. Use curved lines to give the hoodie a more organic and comfortable appearance. Pay attention to the proportion and fit of the back panel in relation to the overall outline.
Step 4: Add Details and Finishing Touches
To bring your drawing to life, it's essential to add details and finishing touches. Start by adding any additional panels, such as yokes, that may be present on the back of the hoodie. These panels serve both functional and aesthetic purposes, so pay attention to their placement and shape.
Next, add ribbed cuffs and hemlines to the sleeves and bottom of the hoodie. These details contribute to the overall structure and style of the garment. Ensure that the ribbing is evenly spaced and follows the contours of the hoodie.
Finally, erase any unnecessary guidelines and lighten the pencil lines to create a clean and finished drawing. You can also add shading or color to enhance the realism of your artwork if desired.
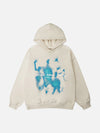
Exploring Different Design Options for the Back of a Hoodie
When it comes to drawing the back of a hoodie, there are various design options to consider. Whether you're looking to create a simple and minimalist hoodie or a bold and eye-catching design, experimenting with different elements can add uniqueness and character to your artwork.
Option 1: Seamless Back Panel
One popular design option is a seamless back panel. This style offers a clean and streamlined look, with no visible seams or distractions. To achieve this, draw a smooth and continuous curve for the back panel, avoiding any breaks or interruptions.
By choosing a seamless back panel, you can create a sleek and modern aesthetic that highlights the simplicity and elegance of the hoodie design.
Keep in mind that when drawing a seamless back panel, it's crucial to pay attention to the fit and proportions of the hoodie. Ensure that the back panel is not too loose or too tight, maintaining a comfortable and flattering silhouette.
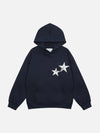
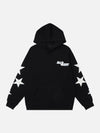
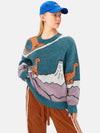
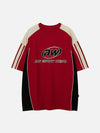
Option 2: Center Seam with Design Elements
If you prefer a hoodie design with more visual interest, incorporating a center seam with additional design elements can be a great option. The center seam acts as a focal point, drawing attention to the back of the hoodie.
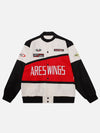
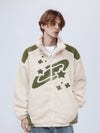
In addition to the center seam, you can add details like contrasting panels, decorative stitching, or graphic prints to enhance the overall design. These elements provide an opportunity to showcase your creativity and personal style.
When incorporating design elements, remember to consider the balance and harmony of the artwork. Each element should complement the others and contribute to the overall visual impact of the hoodie.
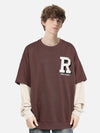
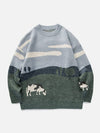
Option 3: Embellishments and Accents
If you want your hoodie design to stand out and make a bold statement, consider adding embellishments and accents to the back. This can include elements like embroidery, patches, or appliques.
Embellishments can add depth, texture, and personality to the hoodie, making it a unique and eye-catching piece. However, it's essential to strike a balance between the embellishments and the overall design to avoid overwhelming the artwork.
When incorporating embellishments, consider the placement and size of each element. They should enhance the aesthetics of the back of the hoodie while maintaining a cohesive and well-thought-out design.
In Conclusion
Drawing the back of a hoodie requires attention to detail and an understanding of its anatomy. By following the steps outlined in this guide, you can accurately depict the back of a hoodie and explore different design options.

Drawing the Back of a Hoodie
When drawing the back of a hoodie, there are a few key steps to keep in mind. Following these steps will help you accurately depict the details and shape of the hoodie:
1. Start by outlining the basic shape of the hoodie. Pay attention to the position of the hood, the shoulders, and the overall fit of the garment.
2. Add the details such as drawstrings, pockets, and any unique features of the hoodie. Take time to observe references and understand how these elements interact with the overall shape.
3. Use shading and highlights to create a sense of depth and dimension. This will bring your drawing to life and make it look more realistic.
4. Pay attention to the fabric texture of the hoodie. This can be achieved through cross-hatching or using various brush strokes to simulate different materials.
By following these steps and practicing regularly, you can improve your skills in drawing the back of a hoodie. Remember to study various references and pay attention to details to make your drawing more accurate and realistic.
Key Takeaways on How to Draw the Back of a Hoodie
- Start by outlining the basic shape of the hoodie using simple lines.
- Add details such as drawstrings, pockets, and seams to give the hoodie a realistic appearance.
- Use shading techniques to create depth and dimension on the hoodie, especially in areas where there are folds or wrinkles.
- Pay attention to the proportions of the hoodie and ensure that it fits well on the figure.
- Experiment with different materials and textures to make the hoodie look more interesting and lifelike.
Frequently Asked Questions
Are you curious about how to draw the back of a hoodie? Here, we've compiled some commonly asked questions to guide you in creating a stunning and realistic depiction of the back of a hoodie.
1. How can I start drawing the back of a hoodie?
To begin drawing the back of a hoodie, start by outlining the shape of the hoodie itself. Use curved lines to depict the hood and the body of the hoodie. Pay attention to the folds and wrinkles that occur naturally in the fabric, and use shading to create depth and dimension.
Next, add details such as drawstrings, logos, or patterns that may be present on the back of the hoodie. Take your time and carefully observe reference images or actual hoodies to ensure accuracy. Finally, refine your drawing by adding more shading and highlights to create a realistic representation of the hoodie.
2. Should I use a reference image when drawing the back of a hoodie?
Using a reference image is highly recommended when drawing the back of a hoodie. It helps you understand the proportions, details, and overall appearance of the hoodie, ensuring that your drawing looks realistic and accurate. Look for images online or take photographs of hoodies from different angles to serve as your reference.
Having a reference image also helps you observe how light and shadows interact with the fabric, assisting you in creating convincing shading and highlights in your drawing. Remember to respect the copyright of any reference images you use and avoid directly copying someone else's artwork.
3. What drawing materials should I use to draw the back of a hoodie?
The choice of drawing materials depends on your personal preference and the effect you wish to achieve. However, some commonly used materials for drawing the back of a hoodie include pencils (graphite or colored), charcoal, markers, or digital drawing tools.
If you prefer traditional mediums, graphite pencils provide excellent control and can create detailed and precise linework. Charcoal pencils or sticks are great for adding dramatic shading and texture. Colored pencils or markers can be used for adding color and vibrant details to your drawing. Alternatively, digital drawing tools offer versatility and allow for easy editing and experimentation.
4. How can I create realistic folds and wrinkles on the back of the hoodie?
To create realistic folds and wrinkles on the back of a hoodie, observe how fabric naturally gathers and folds when worn. Pay attention to areas where the fabric is stretched, compressed, or angled. Use curved lines to depict the folds, ensuring they flow naturally along the contours of the hoodie.
Additionally, shading plays a key role in creating the illusion of depth and volume. Use lighter tones for areas that are stretched or facing the light source, and darker tones for areas that are compressed or in shadow. Gradually build up the shading by layering strokes, and blend them with a blending tool or a tortillon for a smoother appearance.
5. How can I make my drawing of the back of a hoodie look more dynamic?
To make your drawing of the back of a hoodie look more dynamic, consider adding movement and expression to your artwork. You can achieve this by incorporating action lines or wrinkles that suggest motion. For example, you can draw the hoodie slightly billowing in the wind or depict the fabric folding as someone moves.
Additionally, think about the overall composition of your drawing. Experiment with different poses or angles to create an interesting and engaging visual narrative. Remember to maintain the integrity of the hoodie's structure and ensure that any dynamic elements still appear natural and believable.
To conclude, drawing the back of a hoodie is a creative process that requires patience and practice. By following the simple steps mentioned in this article, you can enhance your drawing skills and create realistic hoodie designs.
Remember to start with a basic outline, add details for the hood and draw in the fabric folds. Don't forget to add shading and highlights to give your drawing depth and dimension. With practice and experimentation, you'll be able to draw the back of a hoodie with confidence and create unique designs!