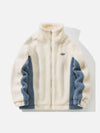
When it comes to adding a unique touch to your shirt, cutting slits can be a stylish and trendy option. Did you know that cutting slits in a shirt has become a popular fashion trend among DIY enthusiasts? It's a simple yet effective way to transform an ordinary shirt into a fashion statement that reflects your personal style.
There are a few key aspects to consider when cutting slits in a shirt. First, it's important to choose the right type of shirt fabric that will work well with the slits. Additionally, the placement and size of the slits can make a significant difference in the overall look of the shirt. By understanding the techniques and following a few simple steps, you can easily create fashionable and eye-catching slits in your shirt.
To cut slits in a shirt, follow these step-by-step instructions:
- Choose a shirt made of fabric that won't fray easily.
- Decide where you want to create the slits and mark the locations with fabric chalk.
- Use sharp fabric scissors to carefully cut along the marked lines, ensuring you don't cut through the entire shirt.
- Start with small slits and gradually make them bigger if desired.
- Optional: You can reinforce the edges of the slits with fabric glue or by sewing a small hem.

The Art of Cutting Slits in a Shirt
Are you tired of your plain old t-shirts? Do you want to add some style and flair to your wardrobe? One trend that has gained popularity is cutting slits in shirts. This simple yet effective technique can transform a basic shirt into a fashionable piece, perfect for a casual outing or a night on the town. If you want to learn how to cut slits in a shirt, you've come to the right place. Read on to discover the different methods and styles to enhance your shirt-cutting skills.
Method 1: Basic Slit Cut
Creating slits in a shirt doesn't have to be complicated. To start with the basic slit cut, follow these steps:
- Choose a shirt that you want to modify. Make sure it's clean and wrinkle-free.
- Lay the shirt flat on a table or any other smooth surface.
- Decide where you want to place the slit. It can be on the front, back, or sides of the shirt.
- Use a fabric pencil or chalk to mark the starting and ending points of the slit.
- Using sharp fabric scissors, carefully cut along the marked line. Start with a small cut and gradually make it longer, depending on your desired length.
- Once you're done, try on the shirt to ensure that the slit is at the right spot and the desired length.
- Optional: You can add a hem or use a fabric glue to prevent fraying if you prefer a more finished look.
Things to Consider
Before you begin cutting, keep the following points in mind:
- Measure twice, cut once: Take precise measurements and think about the placement of the slit before making any cuts.
- Practice on scrap fabric: If you're new to shirt cutting, it's a good idea to practice on a scrap piece of fabric before trying it on a favorite shirt.
- Go slow: Start with a small cut and gradually make it longer. It's easier to make the slit longer than to fix a mistake if you cut too much in the beginning.
- Choose the right scissors: Sharp fabric scissors are essential for a clean and precise cut.
Now that you've mastered the basic slit cut, let's move on to the next method.
Method 2: Fringed Slits
If you want to take your slit-cutting skills to the next level, consider trying fringed slits. This style adds texture and dimension to your shirt. Follow these steps to achieve the fringed slit look:
- Start with a shirt of your choice.
- Decide where you want to place the fringed slits and mark them using a fabric pencil or chalk.
- Cut small, narrow slits along the marked lines. These slits should be close together, but not touching.
- Using a pair of scissors, carefully cut between the slits to create fringe strips.
- Once all the slits are cut, gently pull the strips to stretch and separate them, creating a fringed effect.
- Try on the shirt to see if you're satisfied with the look. You can always make adjustments if needed.
Tips for Fringed Slits
Before you start cutting fringed slits, keep the following tips in mind:
- Experiment with different lengths: Vary the length of the slits and fringe strips to create a more dynamic and textured look.
- Choose different widths: You can also play with the width of the slits, cutting them wider or narrower for different effects.
- Be patient: Cutting and fringing multiple slits can be time-consuming, so take your time and enjoy the process.
- Have fun with colors: Consider using shirts in vibrant colors or patterns to make the fringed slits stand out even more.
Now that you know how to create fringed slits, let's explore another exciting method.
Method 3: Ladder Slits
Ladder slits are a unique and eye-catching way to customize your shirt. These slits create a ladder-like effect, allowing glimpses of skin or undergarments. To create ladder slits, follow these steps:
- Choose a shirt that you want to modify.
- Lay the shirt flat on a table or any other smooth surface.
- Decide where you want to place the ladder slits and mark the spots using a fabric pencil or chalk.
- Using sharp fabric scissors, carefully cut vertical lines from the bottom to the desired length.
- Space the cuts evenly apart, leaving a gap of about an inch or less between each cut.
- Try on the shirt to ensure that the ladder slits are aligned and positioned correctly.
Considerations for Ladder Slits
When creating ladder slits, here are a few things to take into consideration:
- Choose the right shirt material: Thin, lightweight fabrics work best for ladder slits, as they provide a more delicate and elegant look.
- Experiment with spacing: Play around with the gap between each cut to create different effects. Tightly spaced slits can create a more daring look, while wider gaps offer a more subtle reveal.
- Try horizontal ladder slits: Instead of cutting vertical lines, you can also create ladder slits horizontally. This variation can add an interesting twist to your shirt.
Now that you're familiar with ladder slits, let's move on to the final method.
Method 4: Stenciled Slits
If you want to add some creativity to your shirt cutting, stenciled slits are the way to go. With stencils, you can create unique and intricate designs on your shirt. Follow these steps to achieve stenciled slits:
- Choose a shirt that you would like to customize.
- Select a stencil pattern of your choice. You can either purchase stencils or make your own using cardstock or plastic sheets.
- Position the stencil on the shirt and secure it in place with tape.
- Using a fabric pencil or chalk, trace the stencil onto the shirt.
- Remove the stencil and carefully cut along the traced lines.
- Try on the shirt to ensure that the stenciled slits are aligned and the design is intact.
Tips for Stenciled Slits
To get the best results with stenciled slits, keep the following tips in mind:
- Choose contrasting colors: Opt for stencils with a design that stands out against the color of the shirt.
- Get creative with placement: Experiment with the placement of the stenciled slits, whether you want them to be symmetrical, asymmetric, or scattered.
- Add embellishments: Enhance the design further by incorporating beads, sequins, or fabric paint to make your stenciled slits more eye-catching.
Now that you have learned different techniques for cutting slits in shirts, you can unleash your creativity and create unique designs that reflect your personal style. Whether you choose to go with basic slits, fringed slits, ladder slits, or stenciled slits, each method offers a fantastic way to breathe new life into your shirts. So, grab your scissors, find a shirt you want to transform, and get ready to make a fashion statement with your customized slits!

Steps to Cut Slits in a Shirt
To cut slits in a shirt, you will need a sharp pair of scissors, a ruler, and a marking tool. First, start by laying the shirt flat on a clean surface.
1. Identify the area where you want to cut the slits. Measure and mark the length and width of each slit using a ruler and a marking tool.
2. Use the scissors to carefully cut along the marked lines. Make sure to cut through both layers of fabric if the shirt is folded.
3. If you want to create a frayed look, you can use a seam ripper or a small pair of scissors to distress the edges of the slits.
4. After cutting the slits, try on the shirt to ensure they are the desired size and placement. If needed, make adjustments by trimming the slits further or enlarging them.
5. Finally, wash and dry the shirt to enhance the frayed edges and give it a finished look.
Key Takeaways:
- Start by selecting a shirt that you want to cut slits in.
- Decide where you want the slits to be and mark the spots using a fabric marker.
- Carefully cut along the marked lines using fabric scissors.
- Test the size and placement of the slits by trying on the shirt.
- Secure the edges of the slits by sewing them or using fabric glue.
Frequently Asked Questions
Here are some commonly asked questions about cutting slits in a shirt:
1. How should I prepare my shirt before cutting slits?
Before cutting slits in a shirt, it is important to wash, dry, and iron it. This ensures that the fabric is clean, smooth, and easier to work with. Additionally, consider placing a piece of cardboard inside the shirt to prevent accidentally cutting through both layers.
Measure the desired length and placement of the slits using tape or a ruler. Make sure to mark the cutting lines with fabric chalk or pins to guide your scissors.
2. What tools do I need to cut slits in a shirt?
To cut slits in a shirt, you will need the following tools:
- Fabric scissors: These specialized scissors have sharp blades that can smoothly cut through fabric without fraying the edges.
- Fabric chalk or pins: These tools will help you mark the cutting lines on the shirt before you start cutting.
- A ruler or measuring tape: Use these tools to ensure accurate measurements and placements of the slits.
Having these tools handy will make the process of cutting slits in a shirt much easier and more precise.
3. What are some popular styles for cutting slits in a shirt?
There are several popular styles for cutting slits in a shirt, including:
- Side slits: These slits are cut on either side of the shirt, usually starting from the bottom hemline and going up to the waist or hip area.
- Shoulder slits: These slits are cut on the shoulder area of the shirt, creating an edgy and trendy look.
- Back slits: These slits are cut on the back of the shirt, adding a touch of style and creating an interesting detail.
Choose a style that suits your personal preference and the desired look you want to achieve.
4. How do I cut slits in a shirt without damaging the fabric?
To cut slits in a shirt without damaging the fabric, follow these steps:
- Use sharp fabric scissors to ensure clean cuts and minimize fraying.
- Avoid pulling or stretching the fabric while cutting to prevent uneven slits.
- Take your time and cut slowly, especially if you're new to this technique.
- Consider practicing on a scrap piece of fabric before cutting slits in your shirt.
By following these tips, you can cut slits in a shirt without causing any damage to the fabric.
5. Can I add additional embellishments to the shirt after cutting slits?
Absolutely! After cutting slits in a shirt, you can further enhance its style by adding embellishments such as embroidery, beads, or patches. This allows you to personalize the shirt and make it unique to your own taste and preferences.
Remember to plan out the placement of these embellishments before sewing or gluing them onto the shirt to ensure a visually appealing result.
Now that you've learned how to cut slits in a shirt, you can express your creativity and give your old shirts a trendy makeover. Remember to choose the right areas for the slits and use sharp scissors to make clean cuts. Take your time and be careful to avoid any accidents.
Additionally, don't forget to wash and iron your shirt before and after cutting the slits to ensure the fabric lays flat and neat. Experiment with different slit sizes and styles to achieve the desired look. With this skill, you can transform any basic shirt into a fashion statement.